| Fur
|
If enabled, fur is added to the material.
|
| Material
|
Drop-down menu allows you to select a separate
material for the fur strands. You can create a realistic base (dirt) material
for the ground and then have a realistic grass material that is applied only to
the fur strands.
|
| Length
|
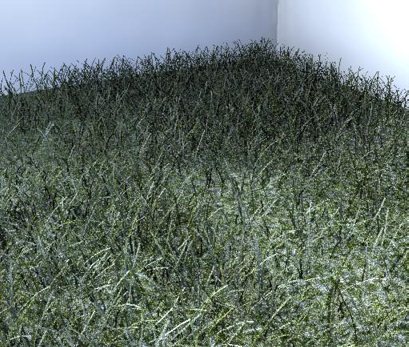
Sets, in master units, the length of each
individual fur strand.

Material
with fur length per strand set to 70mm (left) and to 30mm (right)
Note: This value can
be randomly modified by settings described below.
|
| Length Map (icon)
|
Determines the height of the fur across a surface.
The height of the fur is based upon the intensity of the pixel in the image.
Where a white pixel produces full height fur strands and a black pixel produces
zero height fur strands.

Results
from using a black and white checker image length map
|
| Spacing
|
Sets, in master units, the spacing between
individual strands of fur.

Material
with fur spacing set to 5mm (left) and 15mm (right)
Note: This value can
be randomly modified in the Randomization drop-down settings.
|
| Spacing Map (icon)
|
Controls the fur density across a surface. The
darker the pixel in the image the less dense the fur will be in this area. In
the example following, a white and dark grey checker pattern is used. In the
image the dark grey areas have less dense fur.
|
| Offset
|
Sets the offset distance the fur is created from
the surface it is on.
Material
with fur offset set to 0mm (left) and 100mm (right)
|
| Width
|
Sets the width at the root of each fur strand. This
is defined as a percentage of the spacing between individual strands.
For example, if the spacing is 15mm and the width
is 10%, then the width of each strand is 1.5mm. If the Width is changed to 50%
then the width of each strand becomes 7.5mm.

Width set
to 10% (left) and 50% (right)
|
| Taper
|
Sets the amount that the width of each fur strand
reduces over its length.
A taper of 0% means the width of the root and tip of
each fur strand is the same (7.5mm in the following example). Settings taper to
50% reduces the width to 3.75mm at the tip of the strand.

Taper set
to 0% (left) and 50% (right)
|
| Type
|
Option menu that lets you select from the two types
of geometry are available for individual fur strands.
- Strips — Each
strand of fur is created as a strip.
- Cylinders — Each
strand of fur is created as a cylinder.
Note: Using
cylinders for fur requires more memory for the geometry cache and also takes
longer to render individual images.
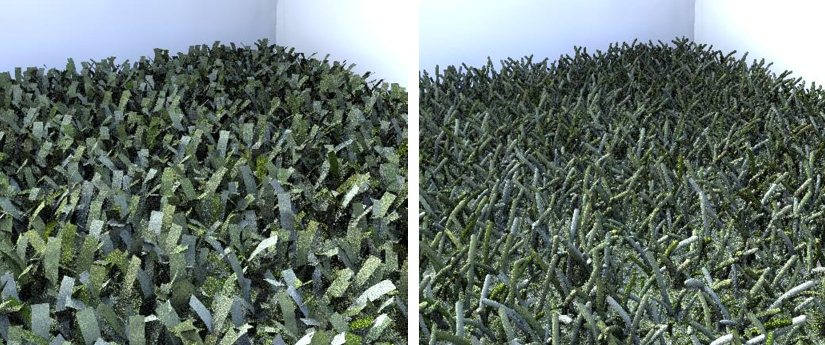
Fur
created as Strips (left) and as Cylinders (right)
|
| Billboard
|
Option menu that lets you select the position of
the fur strands. When using the Billboard, the Taper option is disabled.
- None — Fur strands
are a combination of both upright and flat.
- Trees — Each strand
of fur is upright.
- Leaves — Each
strand of fur is flat.
|
| Rotation
|
Sets the amount that individual fur strands rotate
at their root. A value of 100% will give a random rotation of up to 180
degrees.

Strip
rotation set to 0% (left) and to 50% (right)
|
| Segments
|
Sets the maximum number of sections that make up a
fur strand. A strand which has more bend requires more segments in order to
display smoother curvature. Using more segments will generate more polygons at
render time and consume more memory.
|
| View Frustum Culling
|
If enabled, fur strands are only created on what is
visible in the camera cone. In any type of reflection such as a mirror where
the reflected area is not seen by the camera, the fur is not added.
|
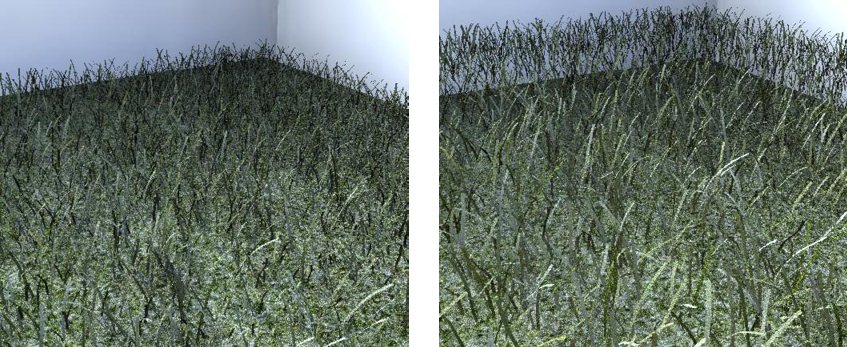
| Adaptive Sampling
|
If enabled, the density of the fur decreases as it
recedes away from the camera, reducing the overall memory requirement for the
fur geometry. This setting is used in conjunction with the Fur Rate setting. In
the following images, the one on the left has adaptive sampling off and the
image on the right has it on. In the right image, the amount of fur is reduced
the further away from the camera it is.

Same model
with Adaptive Sampling off (left) and on (right)
|
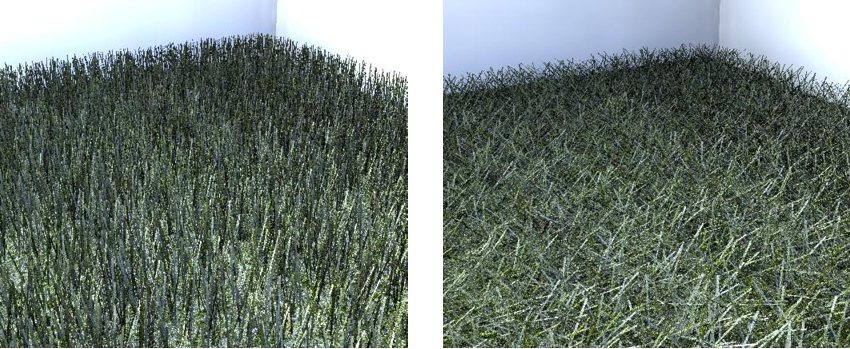
| Rate
|
Sets a threshold that Adaptive Sampling uses to
reduce the number of fur strands. This is calculated as an average distance in
pixels between two fibers. This setting is best used when there are large
numbers of fur strands which recede into the distance, as in grassy fields.
Larger values for fur rate increase the amount of reduction of the fur density
with distance from the camera.

Same model
with fur rate set to 4 (left) and 8 (right)
|
| Auto Fading
|
Auto Fading should be enabled only when animating
scenes that use fur materials to prevent fur strands from popping in or out
between frames.
|
| Remove Base Surface
|
If on, only the fur strands are visible; the base
surface does not display.
|
| Use Hair Shader
|
If on, the specular shading normal is rotated toward
the camera creating highlights that run parallel to the fur direction providing
an overall more realistic
"hair" type highlight. Use only when the geometry
Type is set to Cylinders.
|
| Clumps
|
This is the effect of fur strands gathering
together in small groups. A higher Clumps value causes a tighter grouping of
the strands.

Clumps set
to 10% (left) and 60% (right)
|
| Clump Map (icon)
|
Controls the clumping of the fur across a surface;
use in combination with the fur clumping value. The intensity of the pixel in
the map scales the fur clumping value. A black pixel results in no clumping and
a white pixel results in using the clumping value set in the dialog. In the
following image, a black and white checker map is used to control the clumping.
|
| Clump Range
|
Sets the distance that defines the average area of
fur strands which gather together and is based on the Clumps (percentage)
setting.

Results of
smaller (left) and larger (right) clump range settings
|
| Flex
|
Sets the amount of bend for individual fur strands.
A value of 0 produces straight fur strands and a value of 100% causes the fur
strand to bend 180 degrees.

Flex set to
20% (left) and 60% (right)
|
| Flex Map (icon)
|
Controls the amount of fur flex across a surface.
The intensity of the pixels in the map combine with the flex amount set in the
dialog to control the fur flex across the surface.

Using a
black and white checker pattern flex map
|
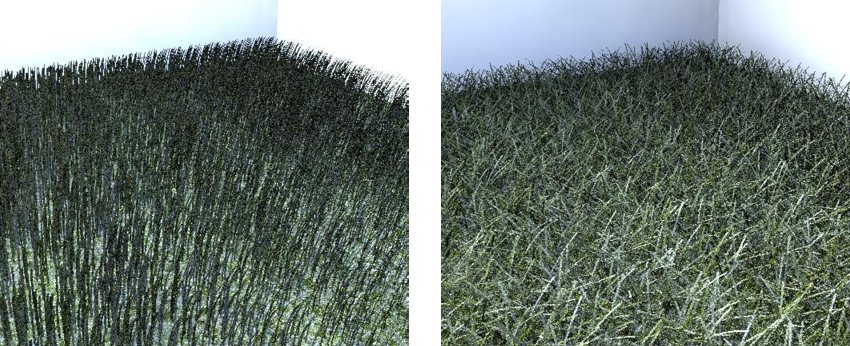
| Root Bend
|
Sets the amount that fur strands lay over towards
the surface, in the direction of the fur growth.
When this value is 0% the direction of the fur
strand is based on the smoothed polygon normal at the base of the fur strand.
As the value is increased to 100% the fur strands lay over towards the surface
in the direction of the fur growth.
Root bend
set to zero (left) and 50% (right)
|
| Randomization
|
The Randomization drop-down menu displays additional
settings.
|
| Growth
|
Sets the randomness of the growth of the fur strand
along its length. Increasing the value, increases the randomness of the growth.

Growth
jitter set to zero (left) and 50% (right)
|
| Growth Jitter Map (icon)
|
Controls the growth randomness across a surface. In
the image below, which uses a black and white checker map, all the randomness
has been switched off except growth jitter. Where the map pixels are black,
there is no growth jitter and all the fur strands are the same length. In the
areas where the map pixels are white, there is jitter applied to the value
specified in the dialog.
|
| Position
|
Sets the randomness of the position of the fur
strands, with larger values increasing the randomness. This only has an effect
when the fur spacing is large.
|
| Direction
|
Used to randomize the angle of rotation for the
root of the fur strand.
Direction
jitter set to zero (left) and to 50% (right)
|
| Size
|
This value randomizes the overall scale of each fur
strand. This change is most noticeable around the edge of the fur.

Size jitter
set to zero (left) and 50% (right)
|