Starting a SewerGEMS Project in ArcGIS Pro
A new ArcGIS Pro project must be created before you can attach a SewerGEMS hydraulic model. If you previously had a SewerGEMS hydraulic model for ArcMap the associated .mxd files cannot be converted.
SewerGEMS for ArcGIS Pro should be started with the dedicated shortcut:

Creating a New ArcGIS Project
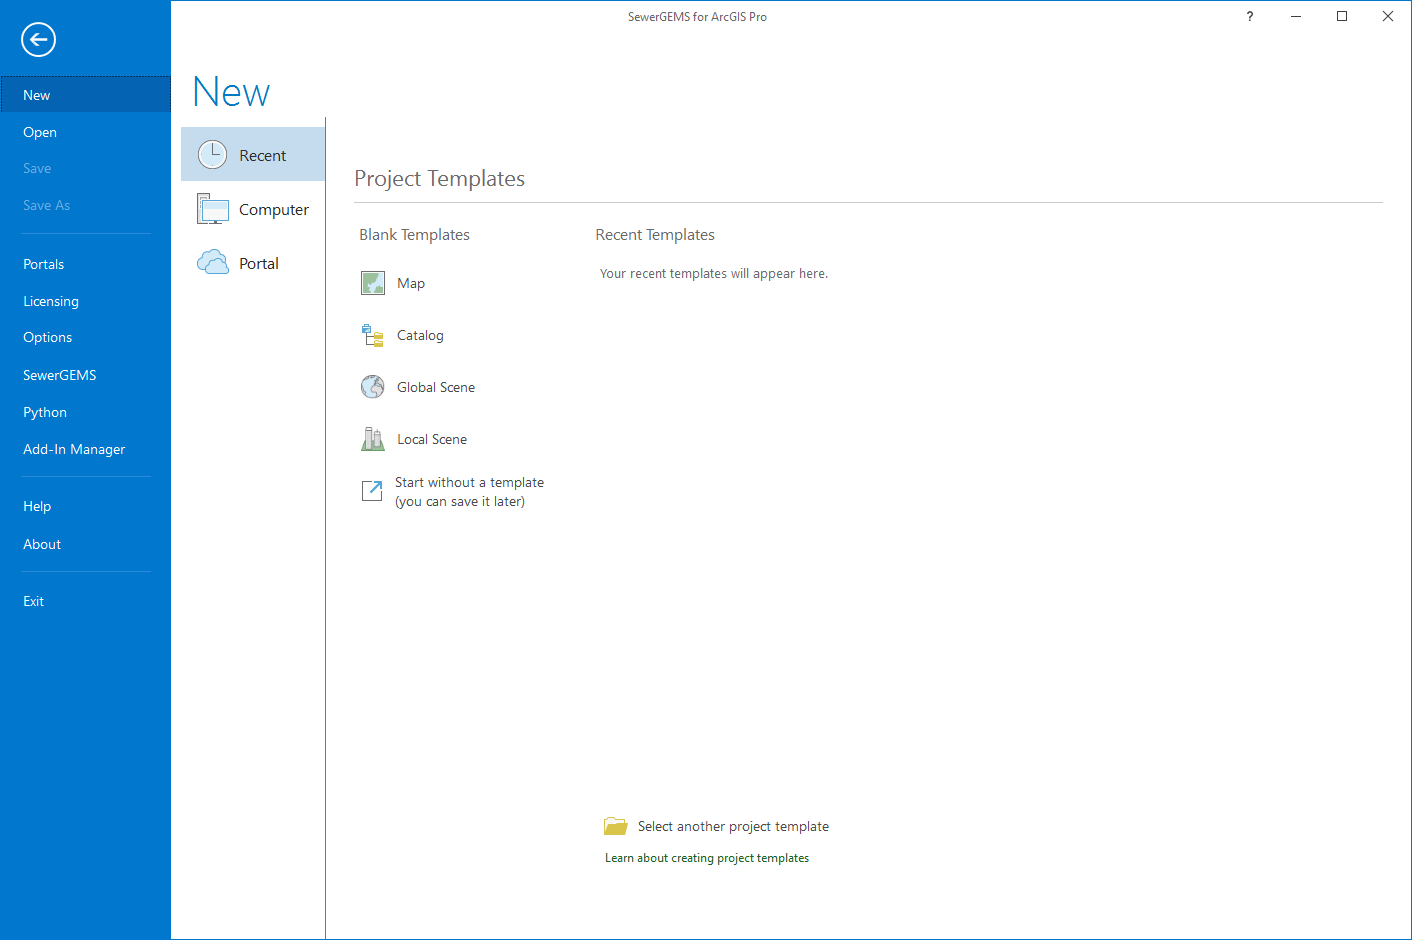
- Open SewerGEMS for ArcGIS Pro using the dedicated shortcut and click the New button.
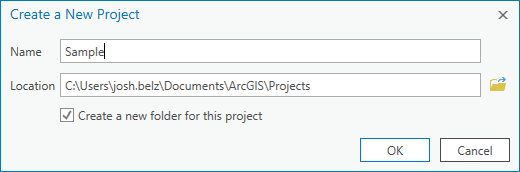
- In the backstage under the project Templates list, click Map. The Create a New Project dialog opens. Enter a name and choose a location for the project files. By default a new folder will be created for the project (when the "Create a new folder..." box is checked). Click OK.
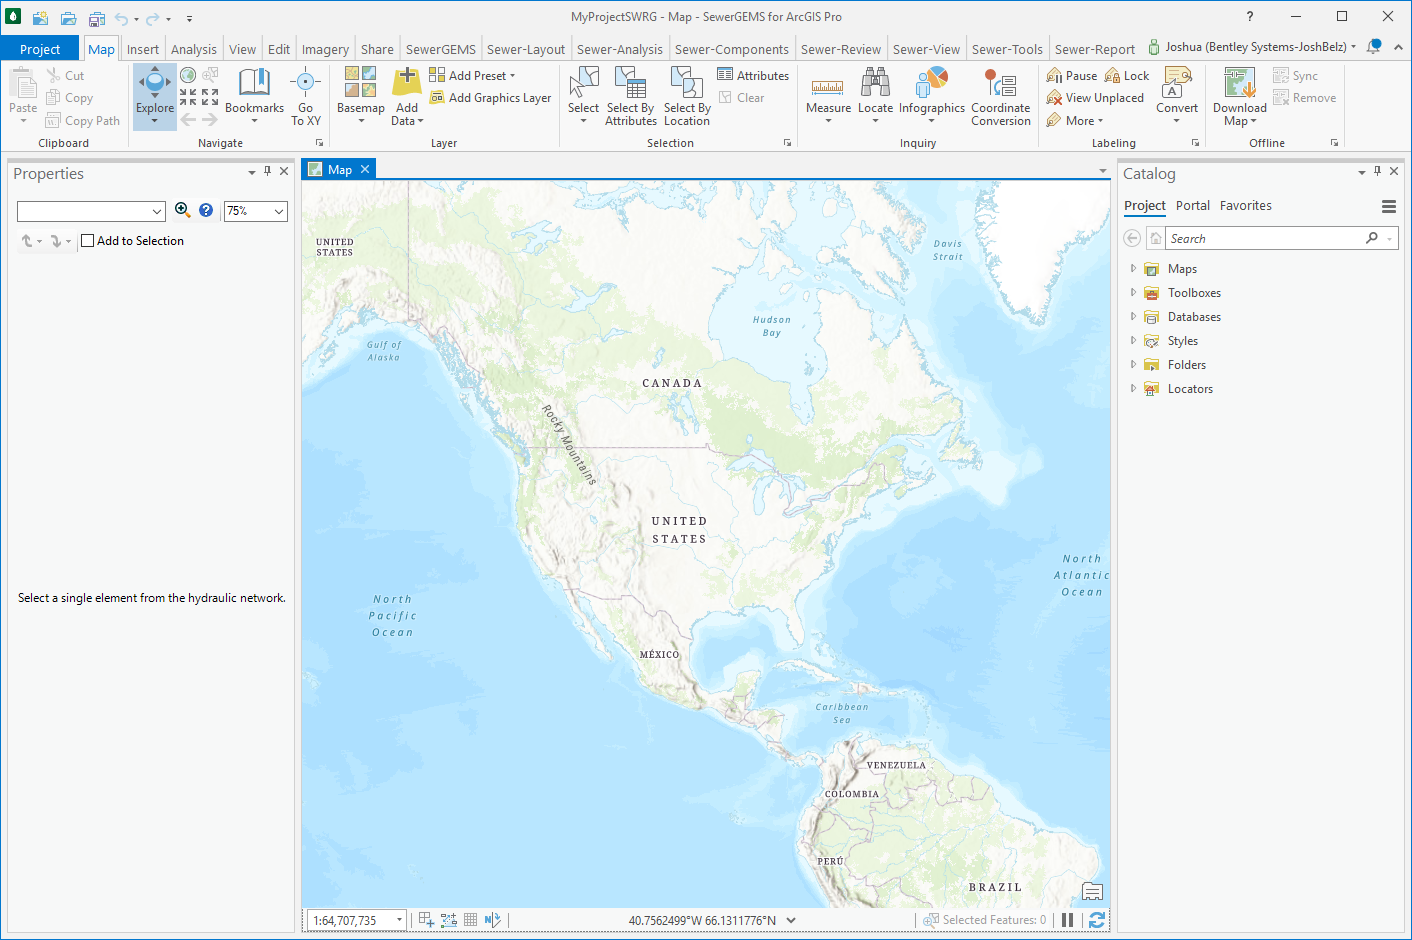
- The ArcGIS Pro workspace opens with the default map view.
Adding a New Hydraulic Model to the Project
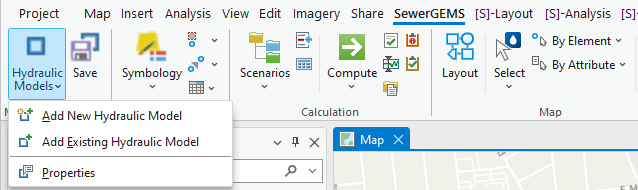
- Click the SewerGEMS tab to access the main SewerGEMS ribbon.
- In the Model Management section of the SewerGEMS ribbon click Hydraulic Models and select Add New Hydraulic Model.
-
The Create the Modeling Geodatabase dialog opens. In this dialog you can choose a location for the geodatabase files and select a coordinate system.
- Modeling Geodatabase: If you would like the geodatabase files to be stored in a directory other than the default, click the folder icon and choose the location.
- Current XY: This section displays the name of the currently selected coordinate system.
- Details: Click Details to open the Coordinate System Details window.
- XY Coordinate Systems Available: This is a list of all available coordinate systems. Click on the desired coordinate system.
- Search: This allows you to search the available coordinate systems by label.
- Spatial Filter: Click Set Spatial Filter to open the Spatial Feature Extent dialog, where you can enter the parameters for the filter. Click Clear Spatial Filter to revert to the unfiltered XY Coordinate Systems Available list.
- Add Coordinate System: Click one of the options to create a new coordinate system or to import one.
- After the hydraulic model is created, you will be prompted to Enable Change Tracking (Yes) or disable it (No).
- You can now begin laying out the elements of your hydraulic model.


Adding an Existing Hydraulic Model to the Project
- Click the SewerGEMS tab to access the main SewerGEMS ribbon.
- In the Model Management section of the SewerGEMS ribbon click Hydraulic Models and select Add Existing Hydraulic Model.
-
The Create the Modeling Geodatabase dialog opens. In this dialog you can choose a location for the geodatabase files and select a coordinate system.
- Modeling Geodatabase: If you would like the geodatabase files to be stored in a directory other than the default, click the folder icon and choose the location.
- Current XY: This section displays the name of the currently selected coordinate system.
- Details: Click Details to open the Coordinate System Details window.
- XY Coordinate Systems Available: This is a list of all available coordinate systems. Click on the desired coordinate system.
- Search: This allows you to search the available coordinate systems by label.
- Spatial Filter: Click Set Spatial Filter to open the Spatial Feature Extent dialog, where you can enter the parameters for the filter. Click Clear Spatial Filter to revert to the unfiltered XY Coordinate Systems Available list.
- Add Coordinate System: Click one of the options to create a new coordinate system or to import one.
- After the hydraulic model is added, you will be prompted to Enable Change Tracking (Yes) or disable it (No).
- The hydraulic model has now been added to the project.