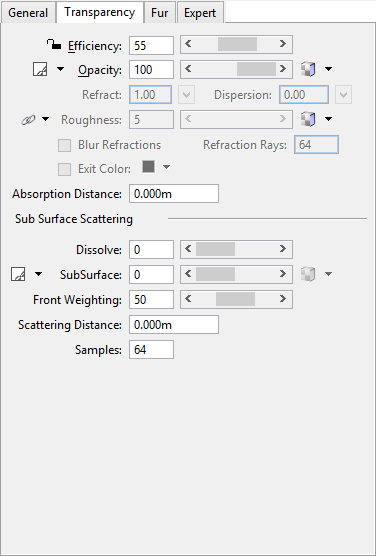
Material Editor Dialog (Advanced Mode), Transparency Tab
| Setting | Description |
|---|---|
| Efficiency | Lets you define the efficiency of the material directly, either by adjusting the slider or by typing a value in the associated field. Efficiency is defined as the total percentage of incoming light that is re-transmitted back into the environment. This includes diffuse and specular reflections, as well as the light transmitted through opacity and translucency. When the efficiency is 100% or greater, it displays in red, warning that the material is unrealistic. Typical materials in the real world generally range in efficiency from 30% to 70%. |
| Lock icon (efficiency) | Clicking the icon turns on or off the lock.
If on (locked), the efficiency of the material is locked such that modifying the diffuse, specular, opacity, or translucency components will automatically adjust the other components to maintain the efficiency value. If off (unlocked), modifying the diffuse, specular, opacity, or translucency components changes the efficiency value, but does not automatically adjust the other components. |
| Opacity icon | Lets you define an opacity color or to link opacity to other settings.
|
| Opacity scale | Defines the percentage of incoming light that is not transmitted directly through the material. Values may range from 0 (Clear) to 100 (Opaque) and may be typed in the text field, or adjusted using the slider. |
| Opacity map icon | Lets you link Opacity to a map or other settings. When Opacity is set to zero the material is transparent regardless of the map. As the opacity changes, the transparency is a result of the combination of the opacity value and the contents of the map. When Opacity is set to 100, the value of the map is used to determine the opacity such that white pixels are fully opaque and black pixels are fully transparent. Click the arrow icon to open a menu with the following options:
|
| Refract | Refract is only available when Opacity has a value less than 100. Sets the index of refraction, which controls how much the light changes direction as it passes through a transparent material. Values range from 0.1 to 3.0. A value of 1.0 causes no change of direction. Values can be typed in the text field or selected from the option menu which opens when you click the arrow icon. This menu provides standard values for refraction, such as Air, Water, Plastic, Glass, Crystal, Diamond. |
| Dispersion | Sets the amount of light separation on transmission through a material, such as occurs when light passes through a prism. Click the down arrow to display a list of common physically-correct dispersion values. |
| Roughness icon | Lets you define a custom roughness value or link roughness to specular. |
| Roughness | Defines the percentage of roughness displayed on the material. Values may range from 0 to 100. You can type a value in the text field or use the slider. Simulates the effect of frosted glass. The higher the roughness value, the rougher the surface, resulting in refractions that are more blurred. |
| Roughness map icon | Lets you link Roughness to a map or other settings. Click the arrow icon to open a menu with the following options:
|
| Blur Refractions | When on, items visible through the material are blurred. Roughness of the blurry refraction is controlled by the refraction roughness value. |
| Refraction Rays | Sets how many refraction rays are used to create the blurring. Increasing the number of rays can improve the image but takes longer to render. |
| Exit Color | Sets an Exit Color for refraction rays. Allows you to set refraction rays to a reasonable termination point improving performance in scenes with many transparent objects without producing unnatural black pixels. |
| Absorption Distance | The distance light has to travel through the surface before it acquires the transparent color of the surface. Colored transparent surfaces do not often exhibit even coloration. Thin areas appear colorless while thicker areas tint with color. The Absorption Distance controls this effect, setting how far a ray must travel to get 100% of the transparency color. The falloff is determined by Beer’s Law, just as in the real world. |
| Dissolve | Enables the object using this material to be faded from view, higher values produce more fading. A Dissolve value of 100 means the object completely disappears from view when rendered. |
| SubSurface icon | Lets you define a subsurface color or to link subsurface to other settings.
|
| SubSurface | Controls the amount of light that illuminates the side of the surface opposite the light source. That is, the percentage of incoming light that is transmitted through the material and scattered in all directions as it exits the material. |
| SubSurface map icon | A transparent color map can be used to vary the transparent color of a surface. In addition to selecting a color or map, you can also link the transparent color to either the diffuse or specular colors.
|
| Front Weighting | The Front Weighting setting with bias the subsurface scattering sources towards the light source. At 50%, they scatter evenly in both directions. At less than 50%, they scatter towards the light; less than 50% they scatter away from the light. |
| Scattering Distance | This value determines how far the light must travel through the surface before it is tinted by the subsurface color. |
| Samples | Sets the number of samples used when subsurface shading. Higher values result in better images. |


