Saving Message Attachments to ProjectWise
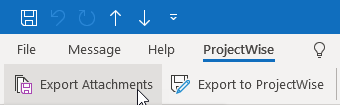
- Select a message with one or more files attached in Microsoft Outlook and then click Export Attachments on the ProjectWise tab, or open the message and click Export Attachments on the ProjectWise tab of the message itself.
- In the
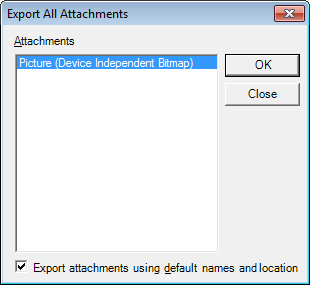
Export All Attachments dialog, do the following:
- Select the attachments you want to save to ProjectWise.
- If you want to modify
document properties before saving, or select where to save the attachments,
turn off
Export attachments using default names and
location.
or
If you have already saved some attachments during this session, and you just want to save the selected attachments to the last used location without modifying document properties before saving, then keep Export attachments using default names and location turned on.
- Click OK.
- Log in to the datasource if prompted (you will not be prompted to log in again during this session of Outlook).
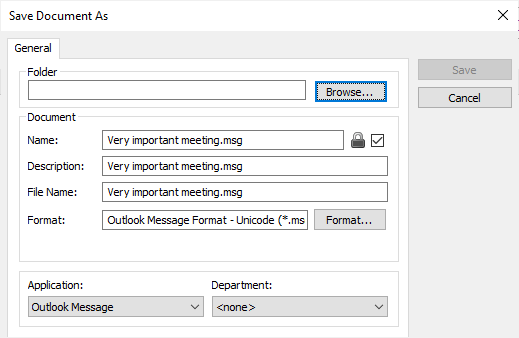
- Use either the
Save Document As dialog or
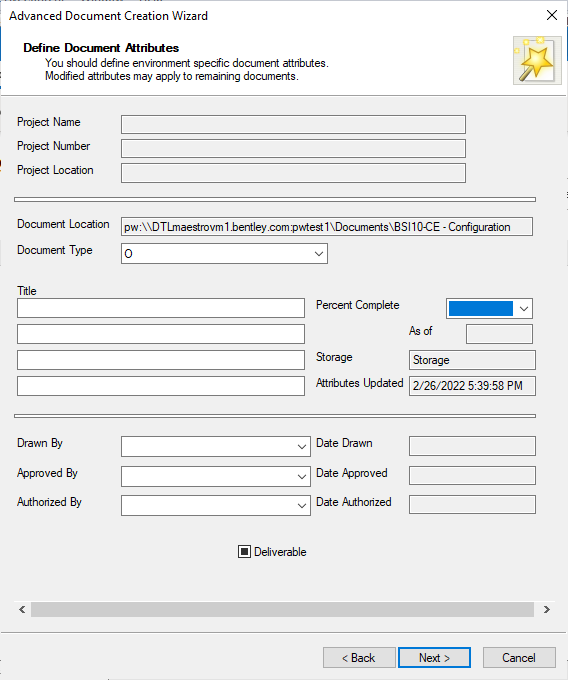
Advanced Document Creation Wizard to
save the message.
(If the Select a Wizard dialog opens, select No Wizard to use the Save Document As dialog, or select Advanced Wizard to use the Advanced Document Creation Wizard).
If you are using the Save Document As dialog, select the folder to store the message in, change general properties as needed (including file format), and click Save.
The Name, Description and File Name properties are automatically pre-populated with the name of the selected attachment, and the attachment is automatically associated with the correct ProjectWise application. If you need to edit the file name independently of the document name, turn off the check box (lock icon) next to the Document Name field. If the check box cannot be turned off, it means your administrator has enforced document and file name locking at the datasource level.
If you are using the Advanced Document Creation Wizard, click Next through the various pages to select the folder to store the message in, define document attribute values (if the selected folder has an environment assigned to it), change general properties as needed (including file format and version label), and click Finish when you are done.